Planting a (Feature) Flag at the Summit: Extending AlpineJS with OpenFeature & DevCycle
Learn how to build a simple plugin that adds OpenFeature compliant feature flagging functionality to AlpineJS using the DevCycle Javascript SDK.


I love the TALL Stack ❤️. For those unfamiliar, TALL stands for Tailwind, Alpine, Livewire and Laravel. Together they represent (in my mind anyways) the future of web development. What makes this stack so exceptional? Well, each component boasts a welcoming community, excellent documentation, solid developer experience and ultimately, they just... work!
As someone working in the feature flag industry, I am always on the lookout for how technologies are incorporating feature flags into their stack. To this end, while I've seen growing adoption in the Laravel (a PHP framework) community, with official packages like Laravel Pennant and third-party packages like OpenFeature Laravel, I recently noticed a gap in Alpine (a Javascript framework). Despite some awesome community created extensions, none focused on feature flags or OpenFeature.
This blog post will explore how I set about to remedy that (and how you could too!) by building a simple plugin for Alpine that adds feature flagging functionality using the DevCycle Javascript SDK and the OpenFeature Web provider.
What is Alpine Primer?
Alpine.js is a lightweight JavaScript framework for adding behavior to HTML markup. It offers the reactivity and declarative nature of frameworks like Vue or React, but with much less overhead.
Core Concepts
- Declarative Bindings: Use directives (e.g.,
x-bind,x-model,x-text,x-on) to bind data, model state, replace text content, and handle events directly in your HTML. - Reactivity: Like Vue, Alpine automatically updates the DOM when data changes through its lightweight reactivity system.
- Component-based: Define components with
x-data, which scopes functionality and state to specific parts of the page.
Usage Example
Here's a basic counter in Alpine:
<div x-data="{ count: 0 }">
  <button x-on:click="count--">-</button>
  <span x-text="count"></span>
  <button x-on:click="count++">+</button>
</div>x-datainitializes the component state and sets thecountvariable.x-on:clickhandles button clicks.x-textupdates the span's text content with the current count.
For more information on the essentials of Alpine visit the docs below:


Extending AlpineJS
Alpine can be extended with custom directives and magic properties.
Custom Directives
Create custom behaviors not available out-of-the-box using Alpine.directive():
Alpine.directive('toggle', (el) => {
    let isVisible = true;  // Initially visible
    el.style.display = 'block';  // Start visible

    el.addEventListener('click', () => {
        isVisible = !isVisible;  // Toggle visibility state
        el.style.display = isVisible ? 'block' : 'none';  // Apply display style
    });
});
Use this new x-toggle directive created above in HTML:
<div x-data>
    <p x-toggle style="cursor: pointer;">
        Click me to toggle my visibility.
    </p>
</div>
This x-toggle directive allows you to toggle the visibility of element by clicking directly on it, while also setting the initial state of the element to visible.
Magic Properties
Add custom global properties with Alpine.magic():
Alpine.magic("random", () => {
    return Math.random();
});
You can then use this new $random magic property in your HTML like so:
<div x-data x-text="$random"></div>This will display a random number within the div each time the component is initialized thanks to the built-in x-text directive.
For more information extending Alpine check out the docs below:
How Do I Build an OpenFeature Plugin for Alpine?
In this section I'll outline how I built my OpenFeature compliant feature flagging plugin in a way that (I hope) will help you to further build on the extension, or to create your own unique plugin for this fun little Javascript framework!
Setting Up Your DevCycle Project
First things, first, we need to head over to app.devcycle.com and create a new Release feature—specifically, a Boolean variable—and set the name/key to boolean. Once that's complete, make sure to copy the Client Key, as you’ll need it for the plugin setup.
Choosing a Plugin Template
When building a plugin, it’s always a good idea to start from a template, where possible. For Alpine, we can turn to a plugin template developed by Mark Mead, known for his Alpine extensions like 🐳 HyperUI, 🛵 HyperJS, & 🎨 Hypercolor.
 markmead
While there is a lot going on in this repository, the most important files for this tutorial are:
README.md- Which provides step-by-step instructions on what needs to be changed in the template to get it working.index.js- Which contains all of the logic that will be used in our plugin.index.html- Which allows for us to easily test out our plugin while it is in development.
Creating an OpenFeature Directive
With the template ready, the next step is to integrate the OpenFeature functionality. First things first though, we'll need to follow the instructions over in the README.md (which will help you install esbuild ) and then we'll need to run:
npm install --save @devcycle/openfeature-web-providerWhich will install the DevCycle OpenFeature Web Provider, and the DevCycle Javascript SDK as a dependency.
Once all these packages are installed, we can head over to index.js to start the process of instantiating our OpenFeature client via a new Alpine directive:
+ import DevCycleProvider from "@devcycle/openfeature-web-provider";
+ import { OpenFeature } from "@openfeature/web-sdk";

export default function (Alpine) {

- Alpine.directive(
-    '[name]',
-    (el, { value, modifiers, expression }, { Alpine, effect, cleanup }) => - {}
-
- Alpine.magic('[name]', (el, { Alpine }) => {})

+  Alpine.store("openfeature", {
+    client: null,
+  });
+
+  Alpine.directive(
+    "openfeature",
+    (
+      el,
+      { value, modifiers, expression },
+      { Alpine, effect, evaluate, cleanup }
+    ) => {
+
+      async function setUpOpenFeature() {
+
+        let providerInfo;
+        try {
+          providerInfo = JSON.parse(expression);
+        } catch (e) {
+          console.error("Invalid JSON string in expression:", expression);
+          return;
+        }
+
+        if (value === "devcycle") {
+          const user = {
+            user_id: "user_id",
+          };
+
+          const devcycleProvider = new DevCycleProvider(providerInfo.key);
+
+          await OpenFeature.setContext(user);
+
+          await OpenFeature.setProviderAndWait(devcycleProvider);
+
+          const openFeatureClient = OpenFeature.getClient();
+
+          Alpine.store("openfeature", {
+            client: openFeatureClient,
+          });
+        } else {
+          console.log(
+            "OpenFeature is not initialized. Please provide a valid provider."
+          );
+        }
+      }
+
+      setUpOpenFeature().then(() => {
+        console.log("OpenFeature client is ready");
+      });
+    }
+  );
}
There are a few different things that we're doing in the above code snippet for the directive:
- Within the
setUpOpenFeaturefunction, we're first parsing the through theexpression, the value portion of the directive which can be found after the equals sign (i.e.x-[DIRECTIVE_NAME]="[EXPRESSION]") and creating a newproviderInfoobject. For our plugin, thisexpressionneeds to be a valid JSON object and contain the necessary data for the Provider to function. - We're then turning to the
valuewhich is what you find immediately following the colon in a directive (i.e.x-[DIRECTIVE_NAME]:[VALUE]="[EXPRESSION]"). This will be used to select vendor specific logic, and ensures that we are able to further extend this plugin in the future by adding additional vendors. - We're then implementing the Getting Started logic from the DevCycle Docs, using the
keyfrom the newproviderInfoobject for our SDK key. - Finally, once it is instantiated, we're saving the
openFeatureClientobject to a new to a new Alpine store (think of it like a global data object) calledopenfeature, which can be easily accessed elsewhere in this plugin.
If you've read the README.md in the template carefully, you'll know that before we can mark this initial setup as complete, there's one more important step. In order for things to work properly, you'll need to replace the placeholder "FILE" in index.js, build.js, and index.html with the actual name of our new extension: "openfeature".
After making these changes, run the command:
npm run buildThis compiles and bundles all the necessary logic from DevCycle and OpenFeature, ensuring that our client-side plugin functions correctly.
Once the build is complete, the final step is some basic testing. Update the index.html file by incorporating the x-openfeature directive and inserting the [DEVCYCLE_CLIENT_KEY] you've saved earlier. This setup allows you to test the plugin in a real-world scenario to ensure everything operates as expected.
 <!DOCTYPE html>
 <html lang="en">
  <head>
    <meta charset="UTF-8"/>
    <meta http-equiv="X-UA-Compatible" content="IE=edge"/>
    <meta name="viewport" content="width=device-width, initial-scale=1.0"/>
    <title>Alpine JS Plugin</title>
    <script src="https://cdn.tailwindcss.com"></script>
-   <script defer src="./dist/FILE.min.js"></script>
+   <script defer src="../dist/openfeature.min.js"></script>

    <script defer src="https://unpkg.com/alpinejs@3.x.x/dist/cdn.min.js"></script>
  </head>
- <body></body>
+  <body class="bg-gray-100 flex items-center justify-center min-h-screen">
+    <div x-data x-openfeature:devcycle='{ "key": "[DEVCYCLE_CLIENT_KEY]", "options": {}}'>
+      <div class="p-8 max-w-md mx-auto bg-white rounded-xl shadow-md space-y-4">
+        <h1 class="text-xl font-semibold text-gray-900">
+          AlpineJS OpenFeature Feature Flags Demo App
+        </h1>
+        <h2>Featuring DevCycle's Web Provider</h2>
+      </div>
+    </div>
+  </body>
 </html>
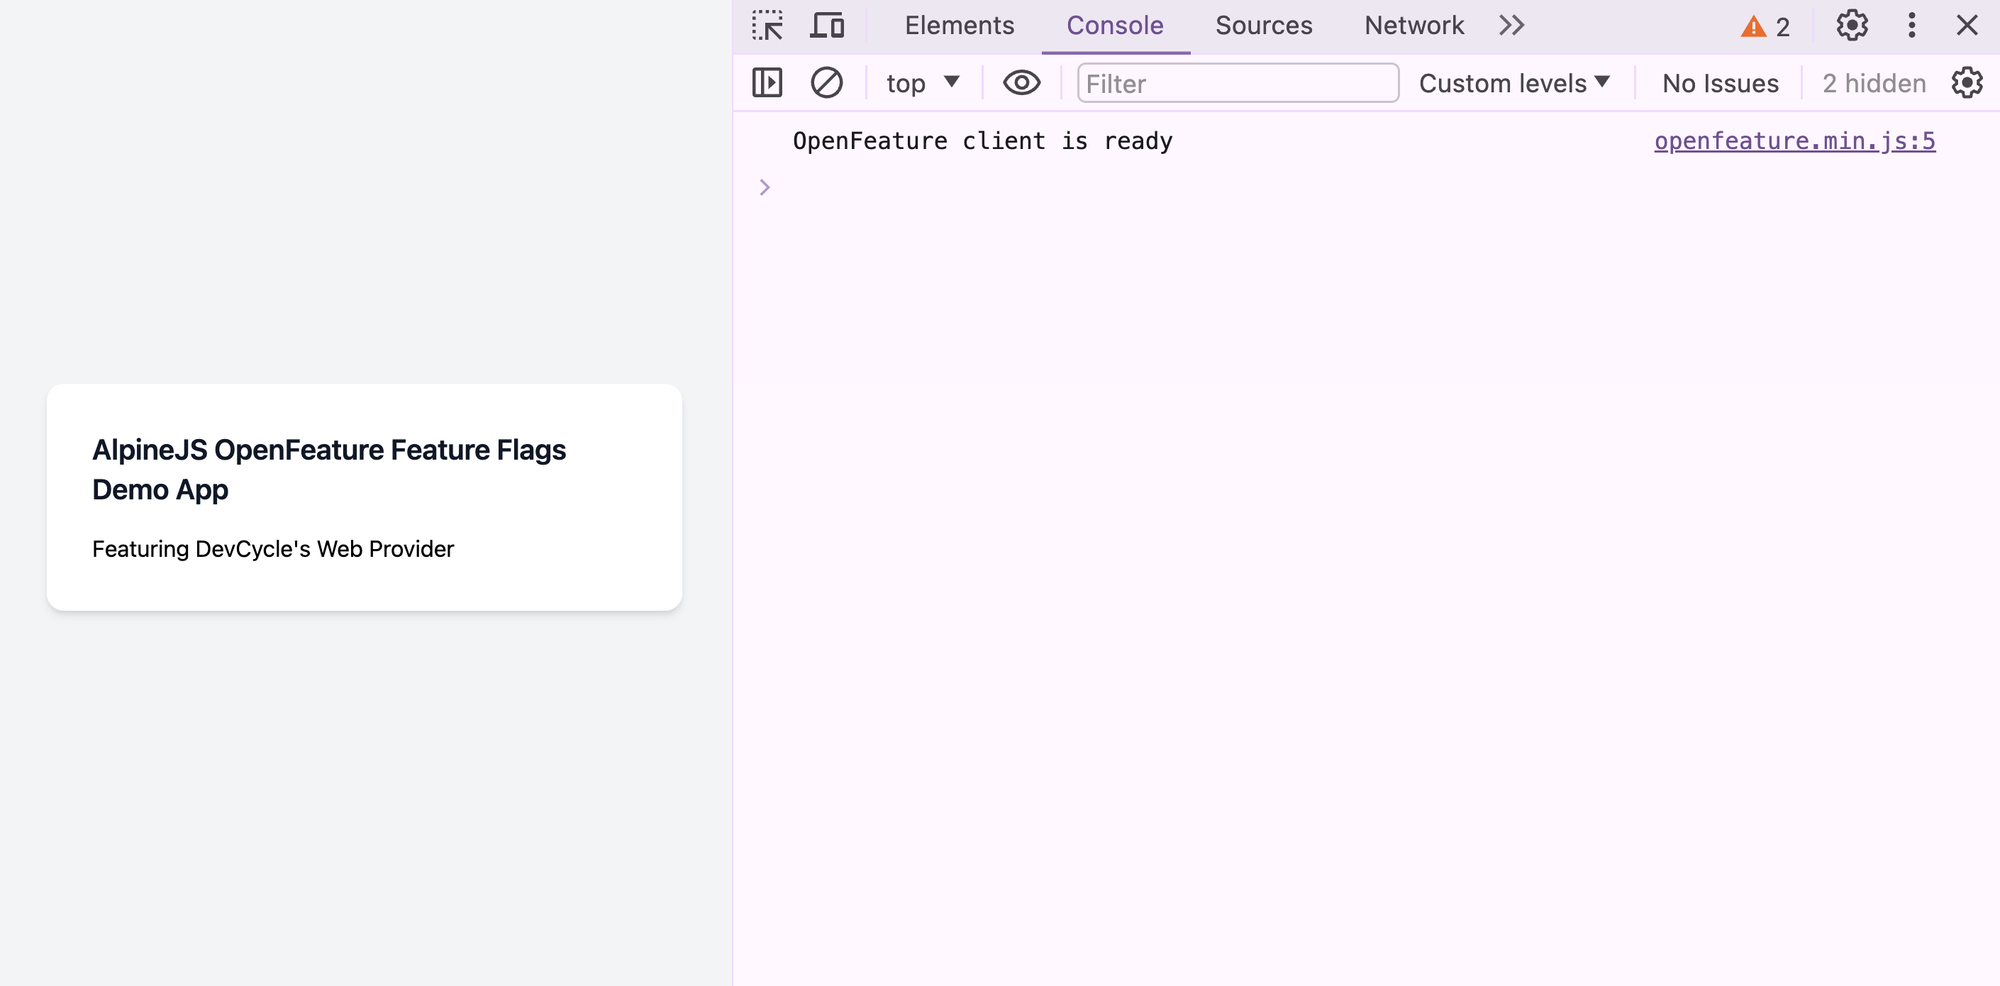
x-openfeature:devcycle is a placeholder for the required [VENDOR] value, which can be changed to a different vendor once the logic has been implemented in the plugin. Currently, if you leave it blank or use another vendor name (e.g., x-openfeature:flagsmith), it will throw an error.When you serve the index.html file, watch the browser console. If the plugin is working as intended, you should see a console message confirming that the "OpenFeature client is ready." This notification tells you that the plugin is successfully initialized and ready to use.
Adding Flag Evaluation Magic
With our OpenFeature client successfully initialized, we’re now ready to add some feature flag "magic" 🧙 starting with Boolean flags.
+ import DevCycleProvider from "@devcycle/openfeature-web-provider";
+ import { OpenFeature } from "@openfeature/web-sdk";

export default function (Alpine) {

  Alpine.store("openfeature", {
    client: null,
  });

  Alpine.directive(
    "openfeature",
    (
      el,
      { value, modifiers, expression },
      { Alpine, effect, evaluate, cleanup }
    ) => {

      async function setUpOpenFeature() {

        let providerInfo;
        try {
          providerInfo = JSON.parse(expression);
        } catch (e) {
          console.error("Invalid JSON string in expression:", expression);
          return;
        }

        if (value === "devcycle") {
          const user = {
            user_id: "user_id",
          };

          const devcycleProvider = new DevCycleProvider(providerInfo.key);

          await OpenFeature.setContext(user);
          await OpenFeature.setProviderAndWait(devcycleProvider);

          const openFeatureClient = OpenFeature.getClient();

          Alpine.store("openfeature", {
            client: openFeatureClient,
          });
        } else {
          console.log(
            "OpenFeature is not initialized. Please provide a valid provider."
          );
        }
      }

      setUpOpenFeature().then(() => {
        console.log("OpenFeature client is ready");
      });
    }
  );

+  Alpine.magic("booleanFlag", (el, { Alpine }) => {
+    return (subject, defaultValue = false) => {
+      return Alpine.store("openfeature").client.getBooleanValue(
+        subject,
+        defaultValue
+      );
+    };
+  });
}
In the code snippet above, we introduced a new $booleanFlag magic within our plugin. This magic requires two parameters: the subject, which is the key of our feature flag, and the defaultValue, a fallback value used when the flag's actual value is not available.
To activate this new functionality, and see the $booleanFlag magic in action, there are a few more steps you'll need to:
- Rebuild the Plugin: Run the command
npm run buildto compile the latest changes into your plugin, ensuring all new logic is correctly integrated. - Update
index.html: Make necessary additions to theindex.htmlfile to include and utilize the$booleanFlagmagic.
 <!DOCTYPE html>
 <html lang="en">
  <head>
    <meta charset="UTF-8"/>
    <meta http-equiv="X-UA-Compatible" content="IE=edge"/>
    <meta name="viewport" content="width=device-width, initial-scale=1.0"/>
    <title>Alpine JS Plugin</title>
    <script src="https://cdn.tailwindcss.com"></script>
    <script defer src="../dist/openfeature.min.js"></script>
    <script defer src="https://unpkg.com/alpinejs@3.x.x/dist/cdn.min.js"></script>
  </head>
  <body class="bg-gray-100 flex items-center justify-center min-h-screen">
    <div x-data x-openfeature:devcycle='{ "key": "[DEVCYCLE_CLIENT_KEY]", "options": {}}'>
      <div class="p-8 max-w-md mx-auto bg-white rounded-xl shadow-md space-y-4">
        <h1 class="text-xl font-semibold text-gray-900">
      AlpineJS OpenFeature Feature Flags Demo App
    </h1>
        <h2>Featuring DevCycle's Web Provider</h2>
+           <template x-if="$booleanFlag('boolean', false)">
+          <div class="p-4 bg-green-200 rounded-lg text-green-800">
+            <p>The 'Boolean' feature flag is <strong>enabled</strong>!</p>
+          </div>
+        </template>
      </div>
    </div>
  </body>
 </html>
This new addition in the code snippet above uses the built-in x-if directive, which displays the relevant <div> only if the logical expression is true, which in our case is if a Boolean flag with the key boolean is set to true.
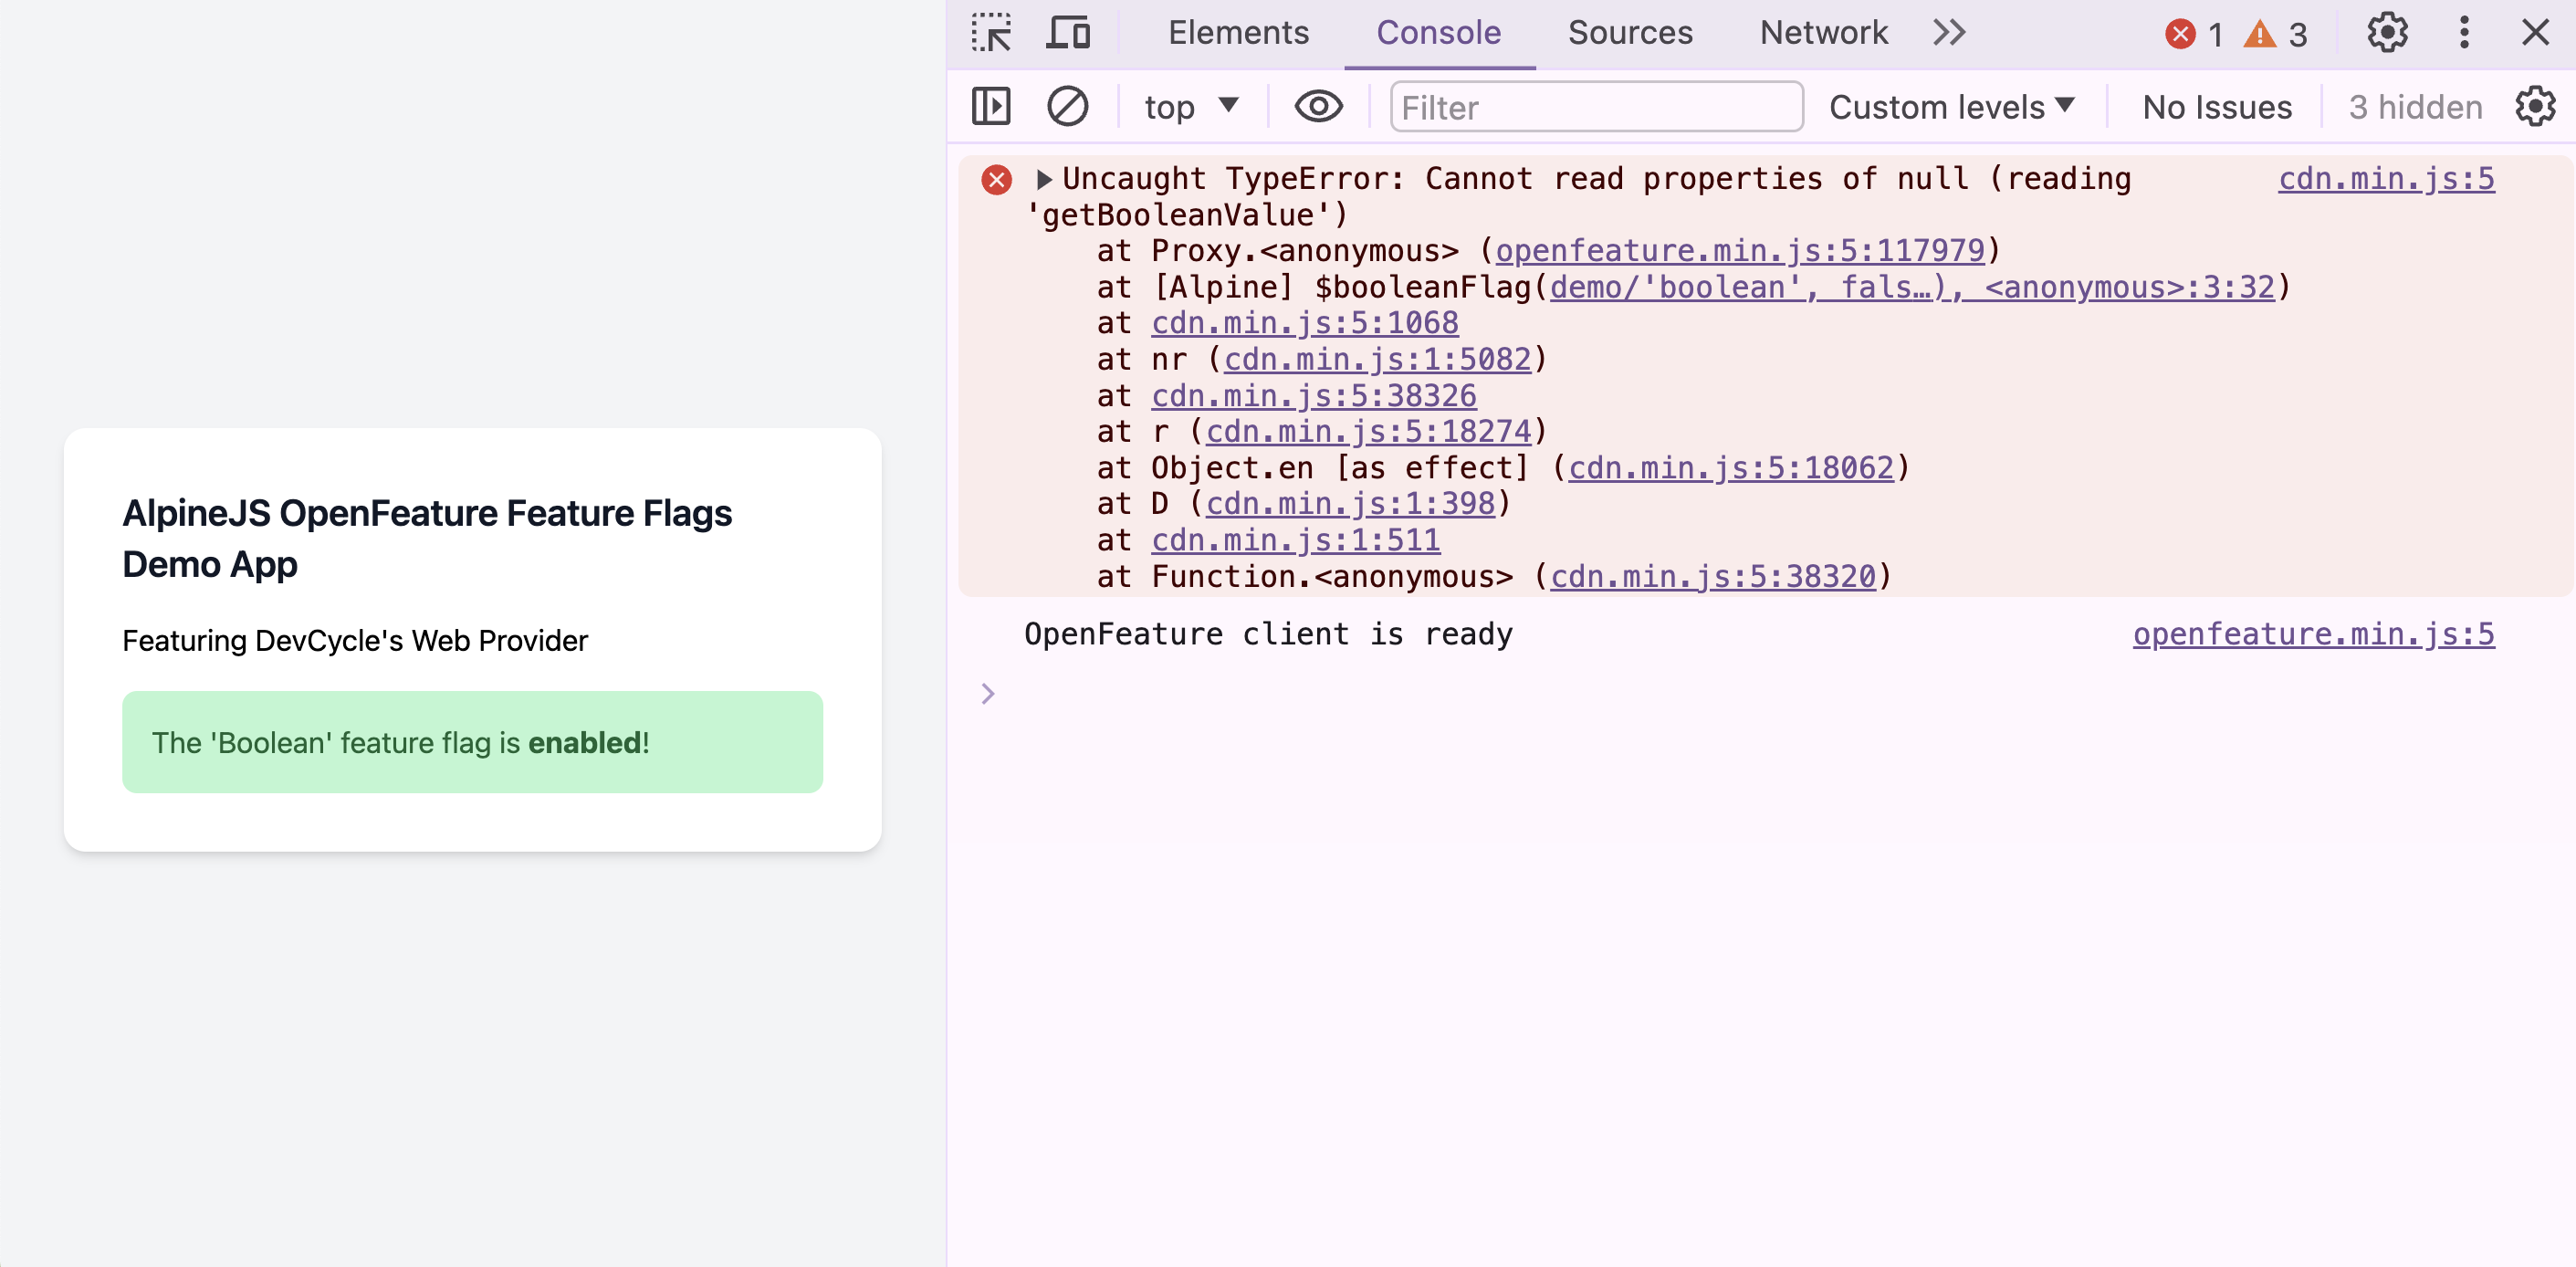
During testing:
- Watch for a Console Warning: You should see "Cannot read properties of null (reading 'getBooleanValue')", indicating an attempt to evaluate the flag before the OpenFeature client is ready.
- Confirm Client Readiness: Look for the "OpenFeature client is ready" message in the console.
- Check for Visual Confirmation: If set up correctly, a green
<div>should appear with the message "The 'Boolean' feature flag is enabled!".
If all three of these things have happened you know you're on the right track!
Fixing the Console Error
Upon page load, you might briefly see a flash of a green <div>, along with a more obvious console error stating, "Cannot read properties of null (reading 'getBooleanValue')." This happens because Alpine initializes only after the DOM is fully loaded, resulting in a moment where Alpine.store("openfeature").client is undefined.
To address this, we can use the singleton instance of the OpenFeature API (i.e. the OpenFeature from our import statement) and set the initial state to an "empty" OpenFeature Client before Alpine is completely setup.
import DevCycleProvider from "@devcycle/openfeature-web-provider";
import { OpenFeature } from "@openfeature/web-sdk";

export default function (Alpine) {

  Alpine.store("openfeature", {
-    client: null,
+    client: OpenFeature.getClient(),
  });

  Alpine.directive(
    "openfeature",
    (
      el,
      { value, modifiers, expression },
      { Alpine, effect, evaluate, cleanup }
    ) => {

      async function setUpOpenFeature() {

        let providerInfo;
        try {
          providerInfo = JSON.parse(expression);
        } catch (e) {
          console.error("Invalid JSON string in expression:", expression);
          return;
        }

        if (value === "devcycle") {
          const user = {
            user_id: "user_id",
          };

          const devcycleProvider = new DevCycleProvider(providerInfo.key);

          await OpenFeature.setContext(user);
          await OpenFeature.setProviderAndWait(devcycleProvider);

          const openFeatureClient = OpenFeature.getClient();

          Alpine.store("openfeature", {
            client: openFeatureClient,
          });
        } else {
          console.log(
            "OpenFeature is not initialized. Please provide a valid provider."
          );
        }
      }

      setUpOpenFeature().then(() => {
        console.log("OpenFeature client is ready");
      });
    }
  );

  Alpine.magic("booleanFlag", (el, { Alpine }) => {
    return (subject, defaultValue = false) => {
      return Alpine.store("openfeature").client.getBooleanValue(
        subject,
        defaultValue
      );
    };
  });
}
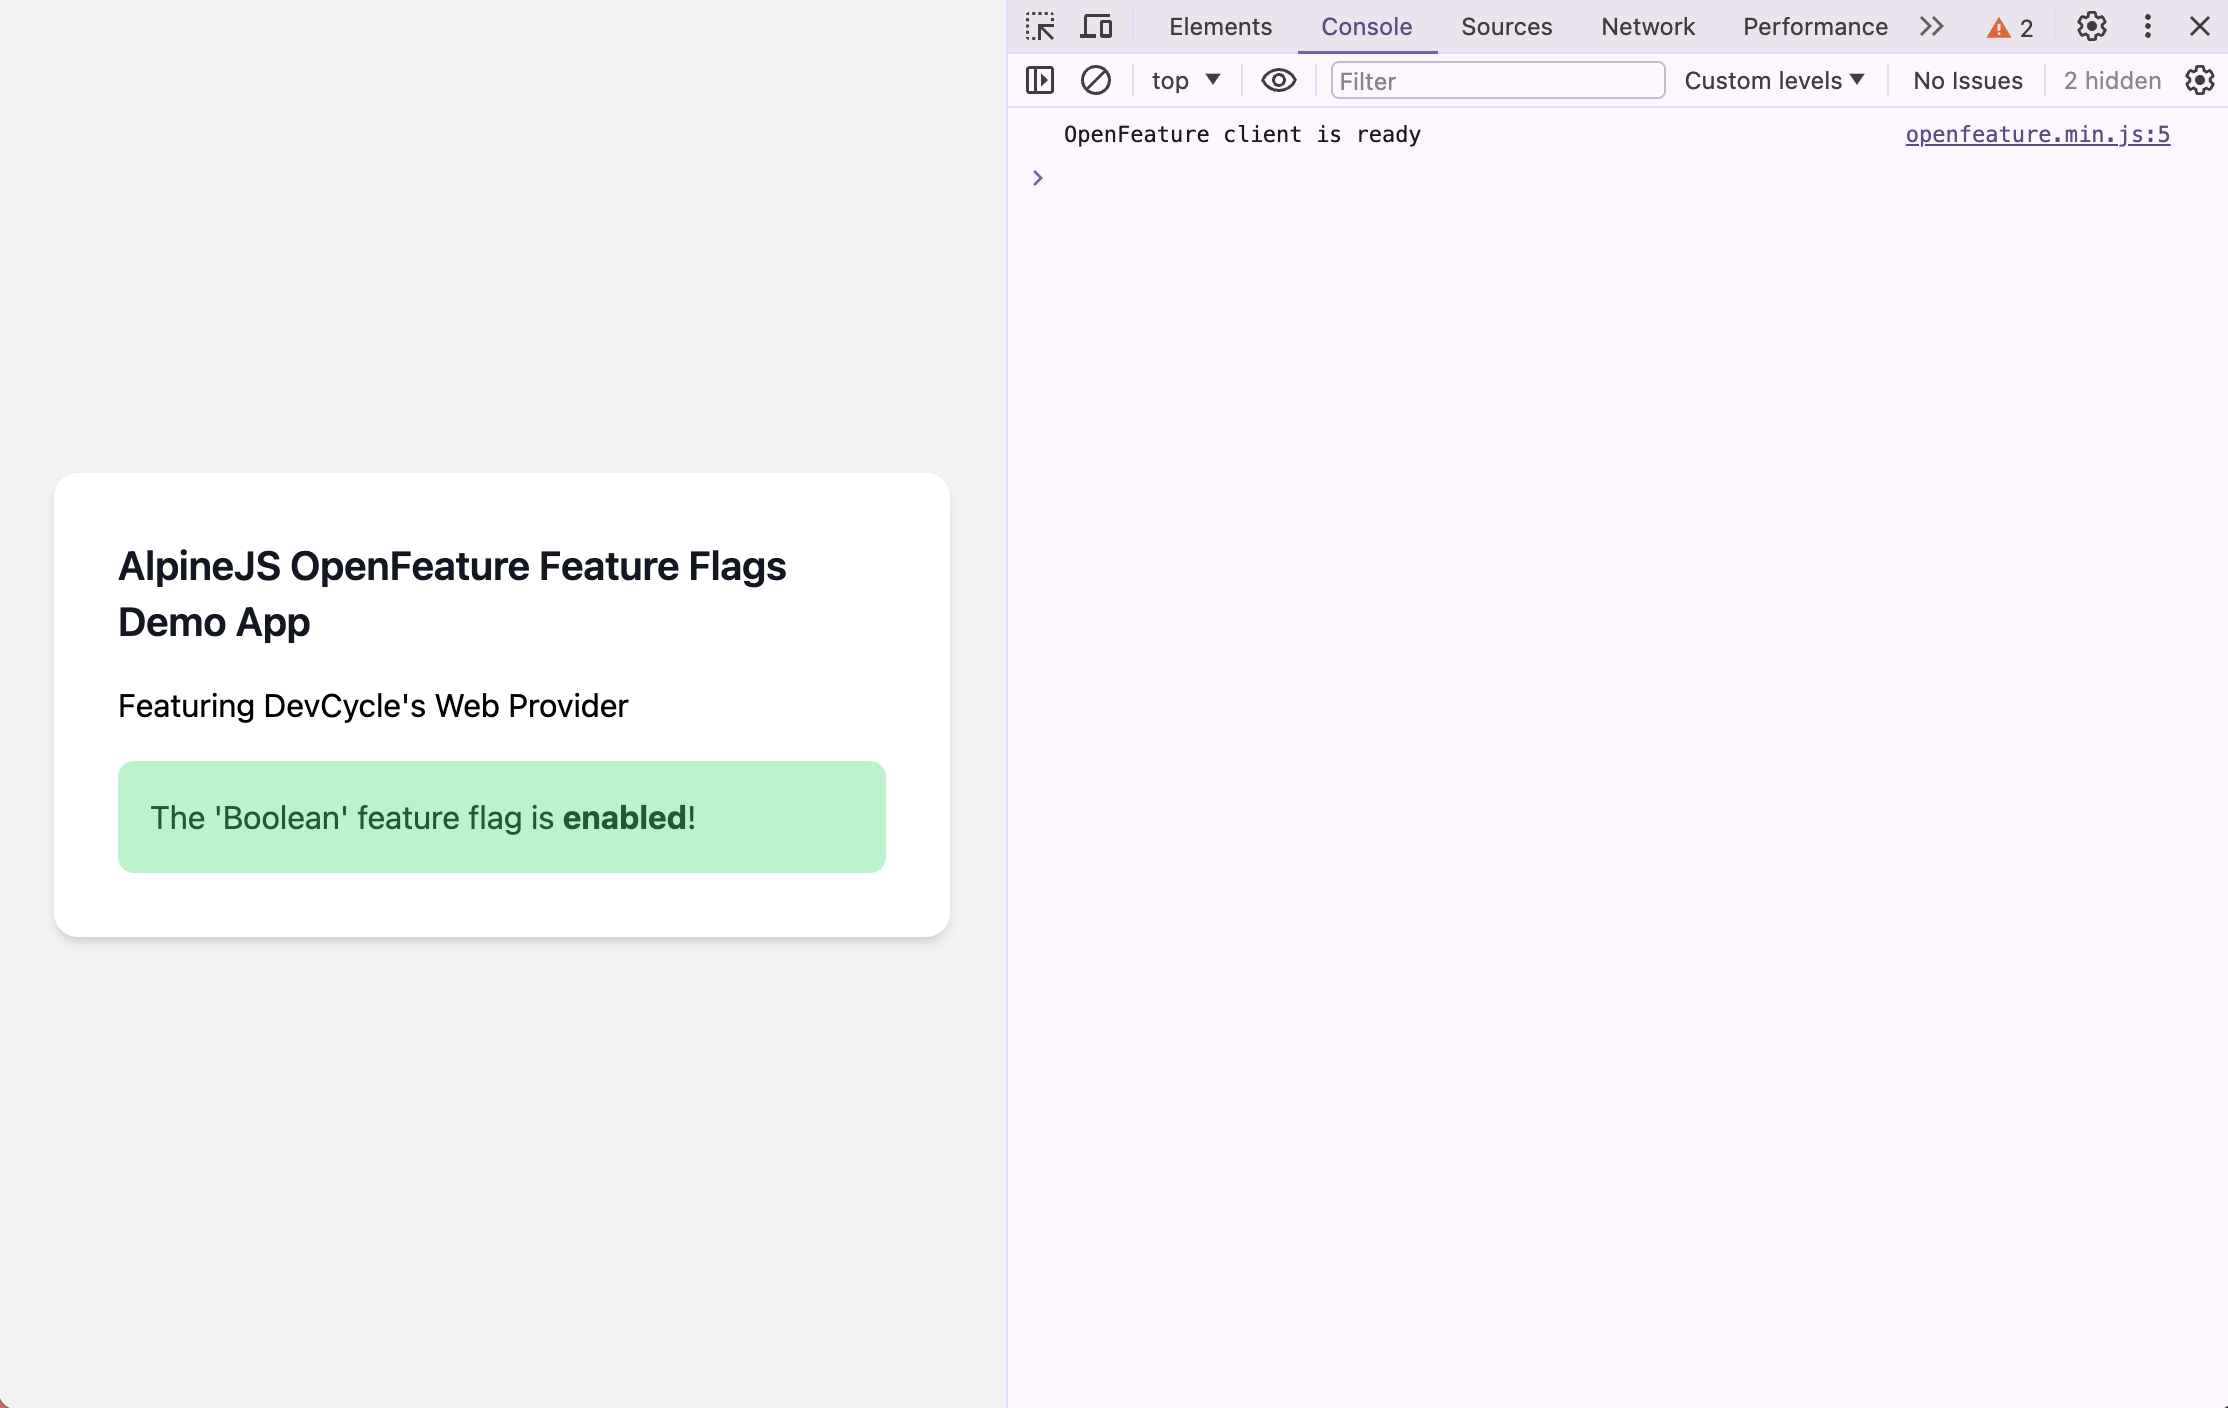
Once this fix is implemented, the console warning should be eliminated, however, you will likely still notice a brief flicker of the green <div> when the page loads.
Fixing the Brief Flicker on Page Load
To fix this flicker, there are a few things we need to do.
- Add a new
setupCompletevariable to theopenfeaturestore with an initial value offalse. Once the instantiation process is complete, update the value totrue. This will allow us to implement logic that ensures the relevant<div>is only visible when it is fully ready.
import DevCycleProvider from "@devcycle/openfeature-web-provider";
import { OpenFeature } from "@openfeature/web-sdk";

export default function (Alpine) {

  Alpine.store("openfeature", {
    client: OpenFeature.getClient();
+   setupComplete: false,
  });

  Alpine.directive(
    "openfeature",
    (
      el,
      { value, modifiers, expression },
      { Alpine, effect, evaluate, cleanup }
    ) => {

      async function setUpOpenFeature() {

        let providerInfo;
        try {
          providerInfo = JSON.parse(expression);
        } catch (e) {
          console.error("Invalid JSON string in expression:", expression);
          return;
        }

        if (value === "devcycle") {
          const user = {
            user_id: "user_id",
          };

          const devcycleProvider = new DevCycleProvider(providerInfo.key);

          await OpenFeature.setContext(user);
          await OpenFeature.setProviderAndWait(devcycleProvider);

          const openFeatureClient = OpenFeature.getClient();

          Alpine.store("openfeature", {
            client: openFeatureClient,
+           setupComplete: true,
          });
        } else {
          console.log(
            "OpenFeature is not initialized. Please provide a valid provider."
          );
        }
      }

      setUpOpenFeature().then(() => {
        console.log("OpenFeature client is ready");
      });
    }
  );

  Alpine.magic("booleanFlag", (el, { Alpine }) => {
    return (subject, defaultValue = false) => {
      return Alpine.store("openfeature").client.getBooleanValue(
        subject,
        defaultValue
      );
    };
  });
}
- Add an
x-showdirective to your main<div>which utilizes thesetupCompletevariable state. This directive will ensure that relevant element is only visible if thesetupCompletevariable is set totrue.
 <!DOCTYPE html>
 <html lang="en">
  <head>
    <meta charset="UTF-8"/>
    <meta http-equiv="X-UA-Compatible" content="IE=edge"/>
    <meta name="viewport" content="width=device-width, initial-scale=1.0"/>
    <title>Alpine JS Plugin</title>
    <script src="https://cdn.tailwindcss.com"></script>
    <script defer src="../dist/openfeature.min.js"></script>
    <script defer src="https://unpkg.com/alpinejs@3.x.x/dist/cdn.min.js"></script>
  </head>
  <body class="bg-gray-100 flex items-center justify-center min-h-screen">
- <div  x-data x-openfeature:devcycle='{ "key": "[DEVCYCLE_CLIENT_KEY]", "options": {}}'>
+  <div x-show="$store.openfeature.setupComplete" x-data x-openfeature:devcycle='{ "key": "[DEVCYCLE_CLIENT_KEY]", "options": {}}'>

      <div class="p-8 max-w-md mx-auto bg-white rounded-xl shadow-md space-y-4">
        <h1 class="text-xl font-semibold text-gray-900">
      AlpineJS OpenFeature Feature Flags Demo App
    </h1>
        <h2>Featuring DevCycle's Web Provider</h2>
           <template x-if="$booleanFlag('boolean', false)">
          <div class="p-4 bg-green-200 rounded-lg text-green-800">
            <p>The 'Boolean' feature flag is <strong>enabled</strong>!</p>
          </div>
        </template>

      </div>
    </div>
  </body>
</html>- Add an
[x-cloak]CSS attribute selector to the style block in your header, and thex-cloakdirective to your main<div>(where thex-openfeaturedirective is found). This will hide the element until Alpine is fully loaded on the page.
 <!DOCTYPE html>
 <html lang="en">
  <head>
    <meta charset="UTF-8"/>
    <meta http-equiv="X-UA-Compatible" content="IE=edge"/>
    <meta name="viewport" content="width=device-width, initial-scale=1.0"/>
    <title>Alpine JS Plugin</title>
    <script src="https://cdn.tailwindcss.com"></script>
    <script defer src="../dist/openfeature.min.js"></script>
    <script defer src="https://unpkg.com/alpinejs@3.x.x/dist/cdn.min.js"></script>
+  <style>
+      [x-cloak] {
+        display: none;
+      }
+    </style>

  </head>
  <body class="bg-gray-100 flex items-center justify-center min-h-screen">
+    <div x-cloak x-show="$store.openfeature.setupComplete" x-data x-openfeature:devcycle='{ "key": "[DEVCYCLE_CLIENT_KEY]", "options": {}}'>
-    <div x-show="$store.openfeature.setupComplete" x-data x-openfeature:devcycle='{ "key": "[DEVCYCLE_CLIENT_KEY]", "options": {}}'>
      <div class="p-8 max-w-md mx-auto bg-white rounded-xl shadow-md space-y-4">
        <h1 class="text-xl font-semibold text-gray-900">
      AlpineJS OpenFeature Feature Flags Demo App
    </h1>
        <h2>Featuring DevCycle's Web Provider</h2>
           <template x-if="$booleanFlag('boolean', false)">
          <div class="p-4 bg-green-200 rounded-lg text-green-800">
            <p>The 'Boolean' feature flag is <strong>enabled</strong>!</p>
          </div>
        </template>

      </div>
    </div>
  </body>
 </html>
Once you have completed these setups the brief flicker should have disappeared.
x-cloak and x-show? Well, it's because x-cloak hides elements before JavaScript loads to prevent flickering, while x-show manages element visibility dynamically after JavaScript has loaded.Expanding to String Variables
The process of adding String flag evaluations to our plugin mirrors the way we implemented Boolean flags. With this in mind, and using the existing booleanFlag magic as a template, you can simply replicate and modify it to create a stringFlag magic.
Although the underlying logic for Boolean and String flags is similar, distinguishing them in the plugin allows for more specialized operations in the future, such as custom validations. However, exploring these advanced implementations falls beyond the scope of this post.
import DevCycleProvider from "@devcycle/openfeature-web-provider";
import { OpenFeature } from "@openfeature/web-sdk";

export default function (Alpine) {

  Alpine.store("openfeature", {
    client: OpenFeature.getClient();
 setupComplete: false,
  });

  Alpine.directive(
    "openfeature",
    (
      el,
      { value, modifiers, expression },
      { Alpine, effect, evaluate, cleanup }
    ) => {

      async function setUpOpenFeature() {

        let providerInfo;
        try {
          providerInfo = JSON.parse(expression);
        } catch (e) {
          console.error("Invalid JSON string in expression:", expression);
          return;
        }

        if (value === "devcycle") {
          const user = {
            user_id: "user_id",
          };

          const devcycleProvider = new DevCycleProvider(providerInfo.key);

          await OpenFeature.setContext(user);
          await OpenFeature.setProviderAndWait(devcycleProvider);

          const openFeatureClient = OpenFeature.getClient();

          Alpine.store("openfeature", {
            client: openFeatureClient,
            setupComplete: true,
          });
        } else {
          console.log(
            "OpenFeature is not initialized. Please provide a valid provider."
          );
        }
      }

      setUpOpenFeature().then(() => {
        console.log("OpenFeature client is ready");
      });
    }
  );

  Alpine.magic("booleanFlag", (el, { Alpine }) => {
    return (subject, defaultValue = false) => {
      return Alpine.store("openfeature").client.getBooleanValue(
            subject,
            defaultValue
          );
    };
  });

+  Alpine.magic("stringFlag", (el, { Alpine }) => {
+    return (subject, defaultValue) => {
return Alpine.store("openfeature").client.getStringValue(
+            subject,
+            defaultValue
+          );
+    };
+  });

}
To test the newly implemented $stringFlag magic, you'll need to do a few more things:
- Create a New String Variable: Visit app.devcycle.com and set up a new string variable for your project. Assign it a key (e.g., 'string') and set "Hello" as the Variation ON and "World" as Variation OFF.
- Build the Plugin: Execute
npm run buildto compile your changes, integrating the new string flag logic into the plugin. - Update
index.html: Modify yourindex.htmlfile to include the$stringFlagmagic and demonstrate its functionality.
 <!DOCTYPE html>
 <html lang="en">
  <head>
    <meta charset="UTF-8"/>
    <meta http-equiv="X-UA-Compatible" content="IE=edge"/>
    <meta name="viewport" content="width=device-width, initial-scale=1.0"/>
    <title>Alpine JS Plugin</title>
    <script src="https://cdn.tailwindcss.com"></script>
    <script defer src="../dist/openfeature.min.js"></script>
    <script defer src="https://unpkg.com/alpinejs@3.x.x/dist/cdn.min.js"></script>
  </head>
  <body class="bg-gray-100 flex items-center justify-center min-h-screen">
    <div x-cloak x-show="$store.openfeature.setupComplete" x-data x-openfeature:devcycle='{ "key": "[DEVCYCLE_CLIENT_KEY]", "options": {}}'>
      <div class="p-8 max-w-md mx-auto bg-white rounded-xl shadow-md space-y-4">
        <h1 class="text-xl font-semibold text-gray-900">
      AlpineJS OpenFeature Feature Flags Demo App
    </h1>
        <h2>Featuring DevCycle's Web Provider</h2>
           <template x-if="$booleanFlag('boolean', false)">
          <div class="p-4 bg-green-200 rounded-lg text-green-800">
            <p>The 'Boolean' feature flag is <strong>enabled</strong>!</p>
          </div>
        </template>

+          <div class="p-4 bg-blue-200 rounded-lg text-blue-800">
+          <p>The 'String' feature flag says "<span class="font-bold" x-text="$stringFlag('string', 'default')"></span>"</p>
+        </div>
+
+        <template x-if="!$booleanFlag('boolean', false)">
+          <div class="p-4 bg-red-200 rounded-lg text-red-800">
+            <p>The 'Boolean' feature flag is <strong>disabled</strong>.</p>
+          </div>
+        </template>
      </div>
    </div>
  </body>
 </html>
Once you've made these changes and served index.html, you should see the following results in the preview window based on the flag settings:
- Variation On: The preview should display "The 'Boolean' feature flag is enabled!" highlighted in green, along with "The 'String' feature flag says 'hello'" highlighted in blue.
- Variation Off: You should see "The 'String' feature flag says 'world'" highlighted in blue, followed by "The 'Boolean' feature flag is enabled!" highlighted in red.
Additionally, your console should log "OpenFeature client is ready" with no errors confirming that the client has initialized properly and is functioning as expected.

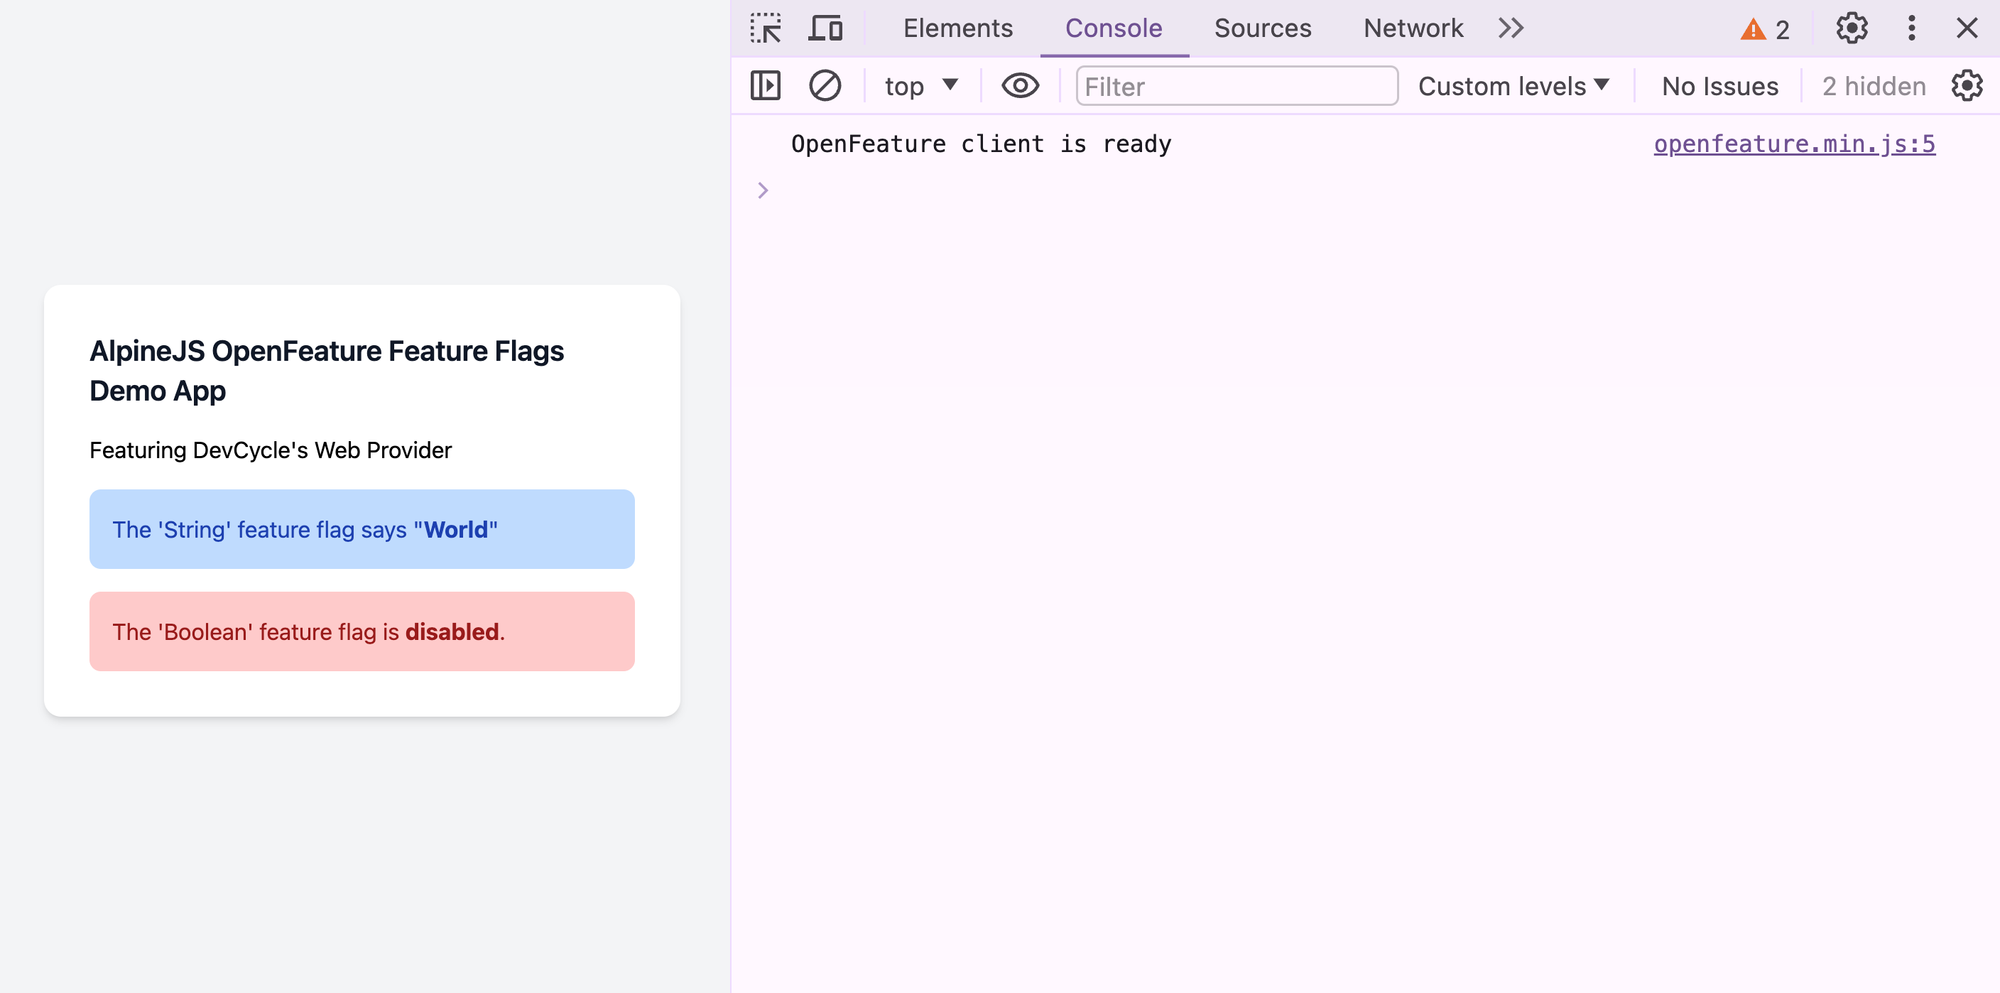
Left: A Preview of the Variation On result | Right: A preview of the Variation Off result
Adding Targeting Rules
One of the biggest perks of using a system like DevCycle for feature flag management is its ability to control who sees what feature. Normally, this would mean tapping into user data collected by an application, but when you’re working with a client-side plugin with limited access to such data, you need to get a bit creative.
Luckily, modern browsers come to the rescue. They provide plenty of useful data about the people visiting your pages—like their browser type, preferred language, and operating system—all easily accessible through the navigator object. By adding this info as custom data to our DevCycle OpenFeature Provider, even client-side plugins can smartly target who sees which features.
import DevCycleProvider from "@devcycle/openfeature-web-provider";
import { OpenFeature } from "@openfeature/web-sdk";

export default function (Alpine) {

  Alpine.store("openfeature", {
    client: OpenFeature.getClient();
    setupComplete: false,
  });

  Alpine.directive(
    "openfeature",
    (
      el,
      { value, modifiers, expression },
      { Alpine, effect, evaluate, cleanup }
    ) => {

      async function setUpOpenFeature() {

        let providerInfo;
        try {
          providerInfo = JSON.parse(expression);
        } catch (e) {
          console.error("Invalid JSON string in expression:", expression);
          return;
        }

        if (value === "devcycle") {
          const user = {
            user_id: "user_id",
+          customData: {
+             browser: navigator.userAgentData?.brands?.[0]?.brand ?? "Unknown",
+            language: navigator.language ?? "Unknown",
+            os: navigator.userAgentData?.platform ?? "Unknown",
+            mobile: navigator.userAgentData?.mobile ?? false,
+          },
          };

          const devcycleProvider = new DevCycleProvider(providerInfo.key);

          await OpenFeature.setContext(user);
          await OpenFeature.setProviderAndWait(devcycleProvider);

          const openFeatureClient = OpenFeature.getClient();

          Alpine.store("openfeature", {
            client: openFeatureClient,
            setupComplete: true,
          });
        } else {
          console.log(
            "OpenFeature is not initialized. Please provide a valid provider."
          );
        }
      }

      setUpOpenFeature().then(() => {
        console.log("OpenFeature client is ready");
      });
    }
  );

  Alpine.magic("booleanFlag", (el, { Alpine }) => {
    return (subject, defaultValue = false) => {
      return Alpine.store("openfeature").client.getBooleanValue(
            subject,
            defaultValue
          );
    };
  });

  Alpine.magic("stringFlag", (el, { Alpine }) => {
    return (subject, defaultValue) => {
return Alpine.store("openfeature").client.getStringValue(
            subject,
            defaultValue
          );
    };
  });

}
By sending this browser data to the Provider with each page load, we gain the ability to dial in our control over which features are shown to whom. For instance, we could set up the system to only show a particular feature (i.e. Variation On) to users who are: on a Mac, using a Chromium-based browser, and have their language set to English. This level of detail helps ensure that the right features reach the right audience, enhancing the user experience.
For more information about how to use Custom Properties for targeting users check out the relevant section in the DevCycle Docs:


Publishing to npm
The final step in this project (for me anyways) was to get the package up on npm. This involved making some last tweaks to the package.json file and following a great guide by Benjamin Semah on freeCodeCamp.org, which walked me through the process step-by-step.
 Benjamin Semah
Testing the Plugin for Yourself
Thanks to the awesome plugin structure provided by Mark Mead, you can start using this plugin in your own application in two ways:
With a CDN
<script
  defer
  src="https://unpkg.com/alpinejs-openfeature@latest/dist/openfeature.min.js"
></script>

<script defer src="https://unpkg.com/alpinejs@3.x.x/dist/cdn.min.js"></script>
With a Package Manager
yarn add -D alpinejs-openfeature

npm install -D alpinejs-openfeatureimport Alpine from "alpinejs";
import openfeature from "alpinejs-openfeature";
import openfeature from "alpinejs-openfeature";
Alpine.plugin(openfeature);
Alpine.start();Where can I find your code?
As always the code used in this tutorial is completely open source. It can be found over on GitHub:
andrewdmacleanAs well, you can find it over on npm: